Voice over Internet Protocol
Hola folks!
I’m Harsh aka G4RUD4, and today I’m sharing a beginner-friendly guide to setting up a VoIP environment. Whether you’re looking to experiment with VoIP tech, dive into packet-level analysis using Wireshark, or build challenges for cybersecurity CTFs, this post has you covered.
What is VoIP?
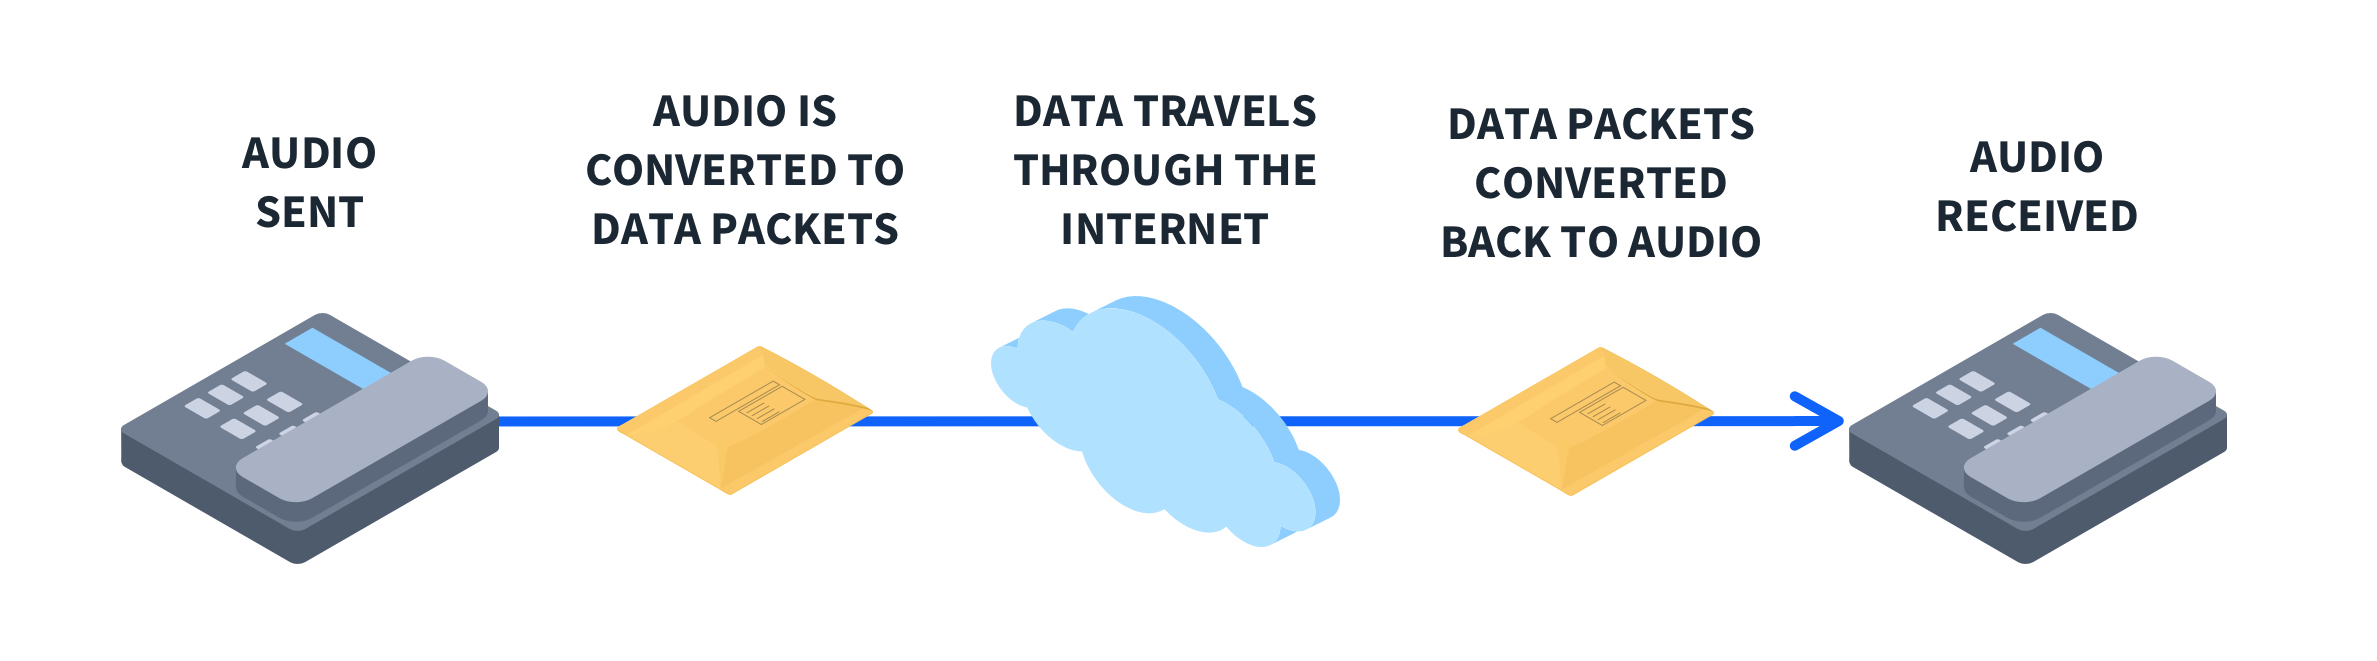
VoIP (Voice over Internet Protocol) allows you to make voice and video calls over the internet instead of traditional phone lines. It converts analog voice signals into digital data that travels over IP networks.
Here’s a simple diagram to show how it works:

What You’ll Need
You can either use two VMs or, like me, run one instance on Windows and another on a Linux VM (Ubuntu 24.04 on Oracle VirtualBox).
Required Tools:
Asterisk (v22.1.0) – Acts as your VoIP server
Linphone (v5.0.2) – A softphone for making calls
Setting Up Asterisk Server on Ubuntu
Open your terminal and run:
1 | wget https://downloads.asterisk.org/pub/telephony/asterisk/asterisk-22.4.1.tar.gz | tar -zxvf asterisk-22.4.1.tar.gz |
`
I used
asterisk-22.1.0.tar.gz, so update the version as needed.
1 | sudo apt-get install build-essential libssl-dev libncurses5-dev libnewt-dev libxml2-dev libsqlite3-dev uuid-dev libedit-dev libjansson-dev sqlite3 |
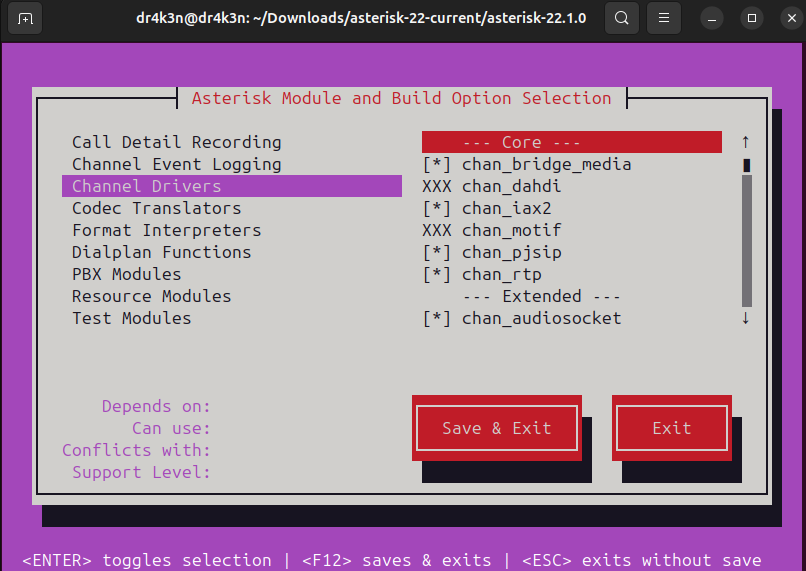
Navigate to the Asterisk folder and enable SIP and RTP modules before building:
1 | sudo make menuselect |
Enable chan_pjsip and chan_rtp modules. Save and exit.
Then run the following commands one by one or by script:
1 | ./configure |
This will take some time. Be patient!
Configuring Asterisk
Edit these files in /etc/asterisk/:
pjsip.conf – SIP user and transport configs
extensions.conf – Dialplan logic
';' is for the comments
pjsip.conf:
1 | [101] |
extensions.conf:
1 | [internal] |
You configure it for the call, messages, files sharing, DTMF(Dial Pad).
Let’s ensure Asterisk loads the ‘chan_pjsip’ module. We can do this by opening the ‘module.conf’ file and updating a specific line.
1 | [modules] |
Make sure autoload is yes.
Starting Asterisk Server
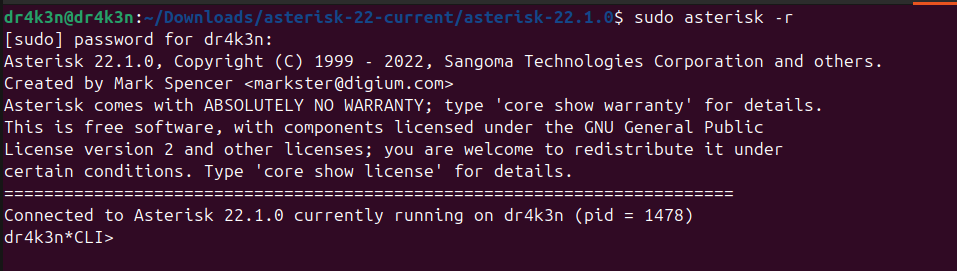
Now we are done. Start Asterisk with:
1 | sudo asterisk -r |
for verbosity -^
Now if you update in the files like pjsip.conf and extensions.conf then you have to run these commands to reload the configurations:
1 | sudo asterisk -rx "dialplan reload" |
For a complete reload -^
To manage the service:
1 | sudo systemctl restart asterisk |
If you run the pjsip show endpoints in the asterisk terminal
You will see this as the output:
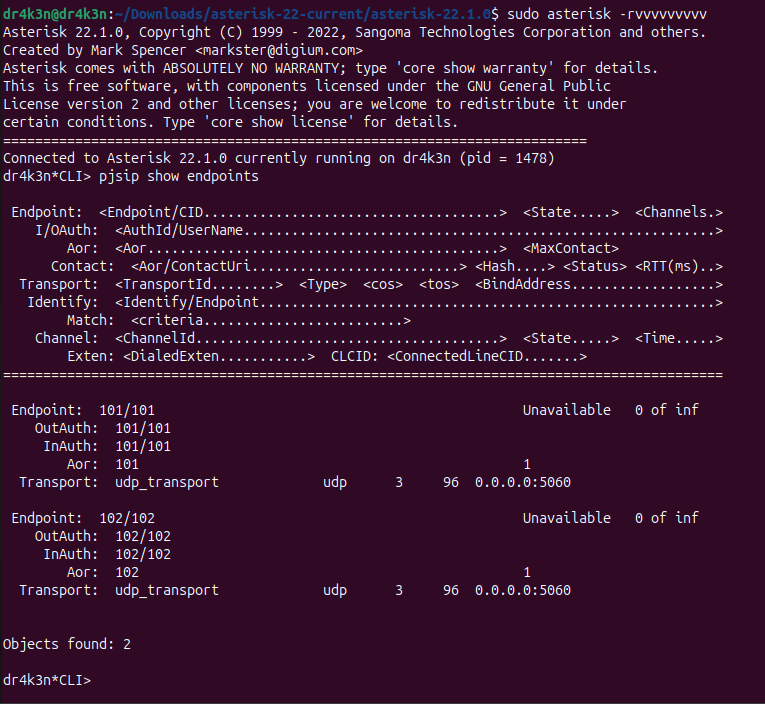
If the softphone is not yet connected, the status will show as “Unavailable.”
Enable debugging by running it in asterisk terminal:
1 | pjsip set logger on |
pjsip log:
1 | dr4k3n*CLI> pjsip set logger on |
It continously sends SIP to establish the connection between Asterisk Server and Liphones.
Setting Up Linphone (Softphone)
We’ll use Linphone to connect with our Asterisk server. Other softphone alternatives include MicroSIP, Zoiper, and Mizudroid (Android).
If Linphone doesn’t work on your Asterisk server machine, try Zoiper instead.
Open Required Ports:
1 | sudo ufw allow 5060/udp |
Use the same version of Linphone on both Windows and Linux to avoid compatibility issues.
For Ubuntu OS:
~/.config/linphone/linphonerc file:
1 | [messaging] |
If possible keep the configuration same for both the Linphone.
Configure Linphone settings to match your SIP user and network setup. Here’s how the user and network settings should look:
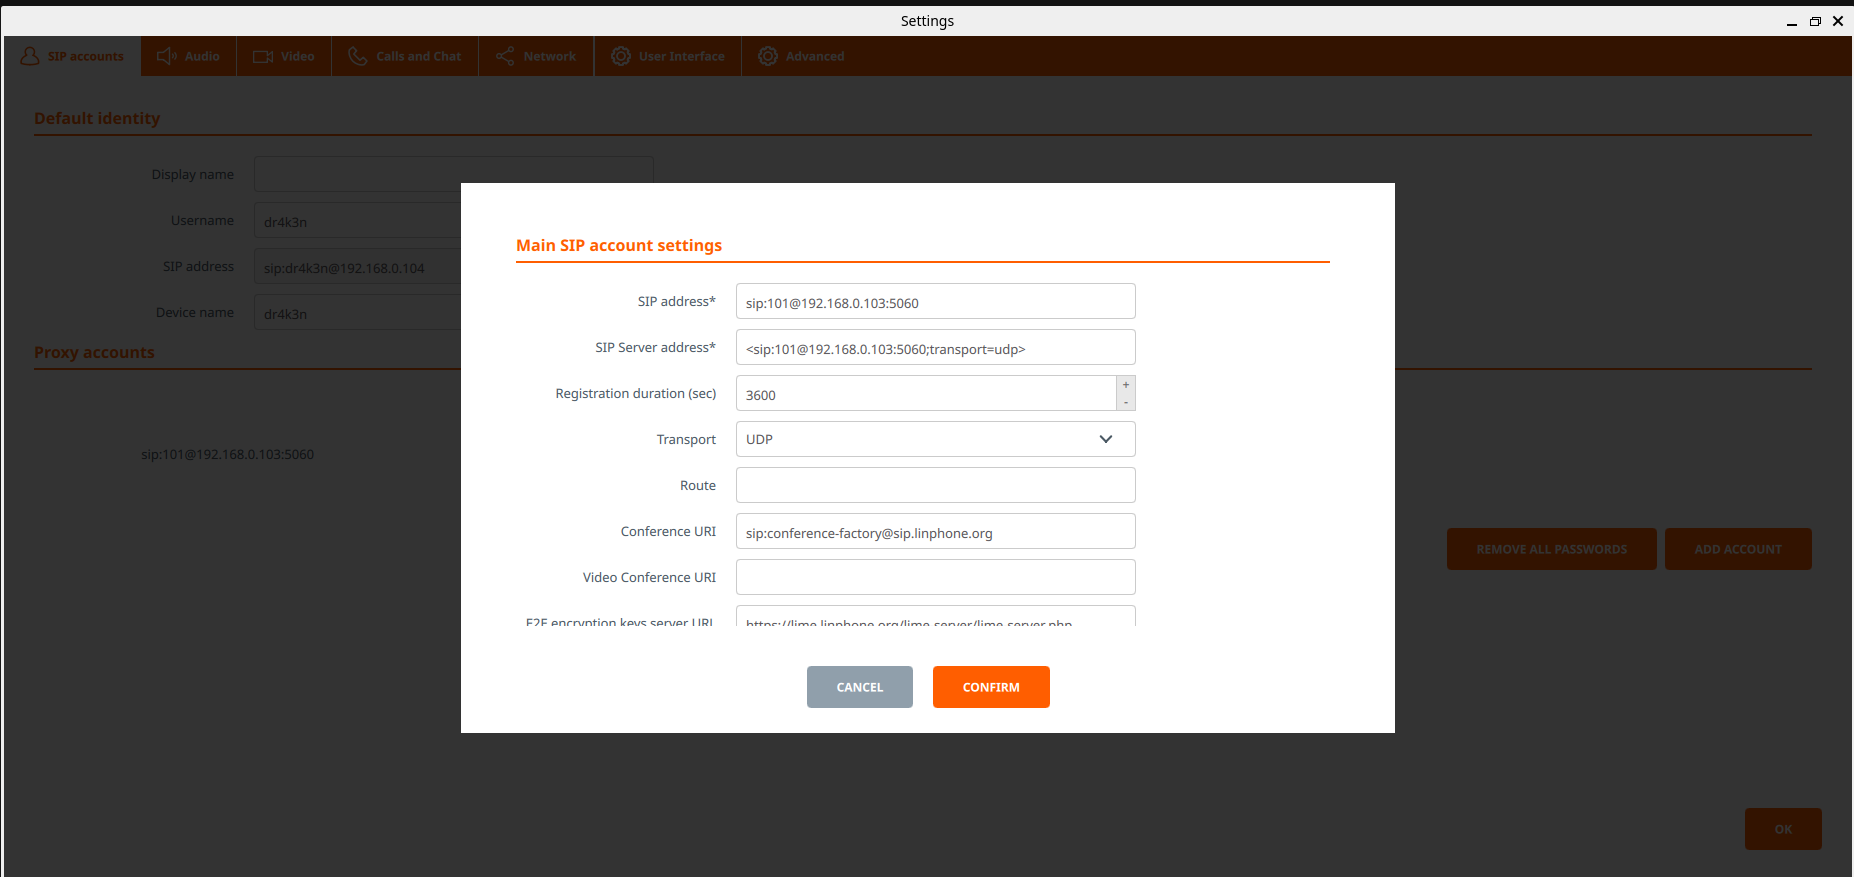

Mostly similar with different port on Windows Linphone, Before starting the call make sure that SIP users and Asterisk server contains the same IP address.
If Ubuntu Linphone doesn’t connect automatically, use a static client first. You can temporarily comment out the contact= line in pjsip.conf to help establish the connection. Once connected, it’ll switch to dynamic mode automatically.
You’ll know it worked when both Linphones show a green “Online” indicator.

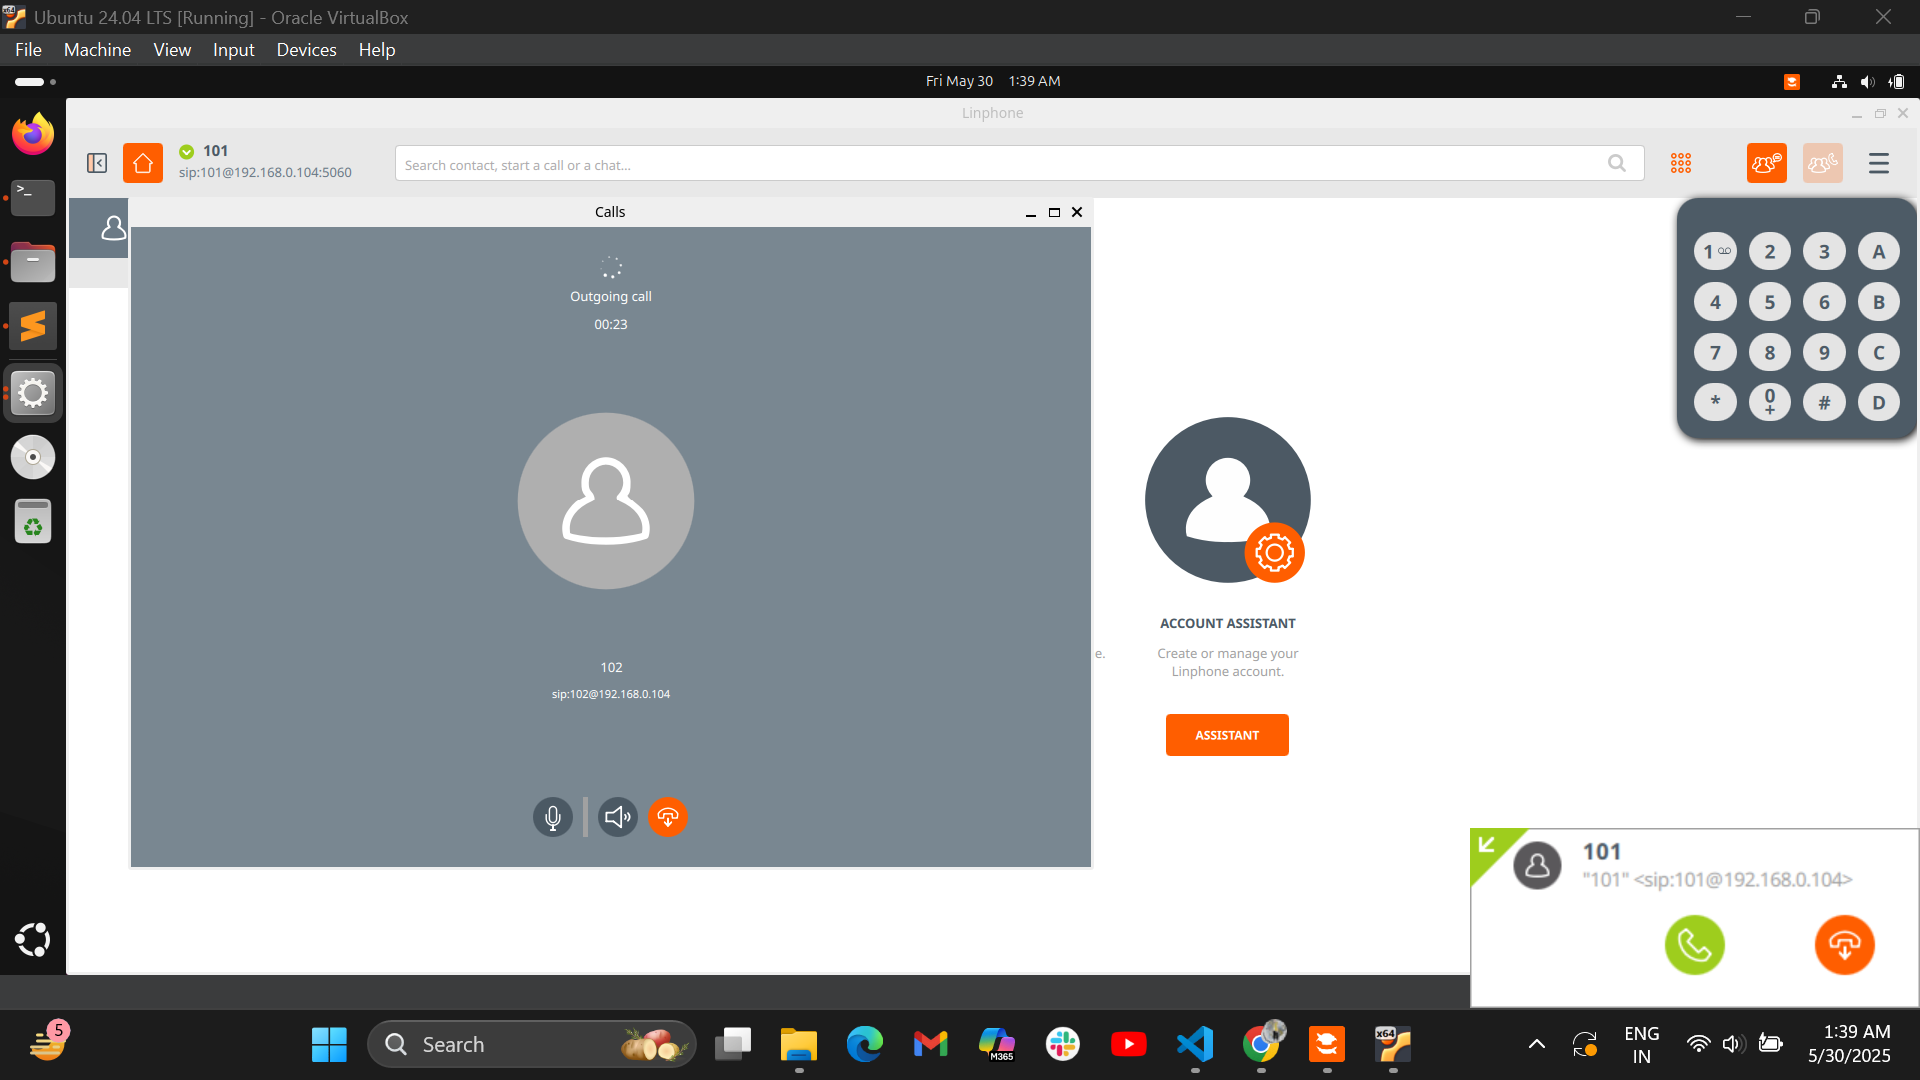
Making the Call
Establish the Call from user 101 by dialing 102 from dial pad and you will get the call UI like this:
After making the call, you can set the rtp debug on which will show you rtp packets which help us to identify whether the call has been connected successfully or not as shown below:
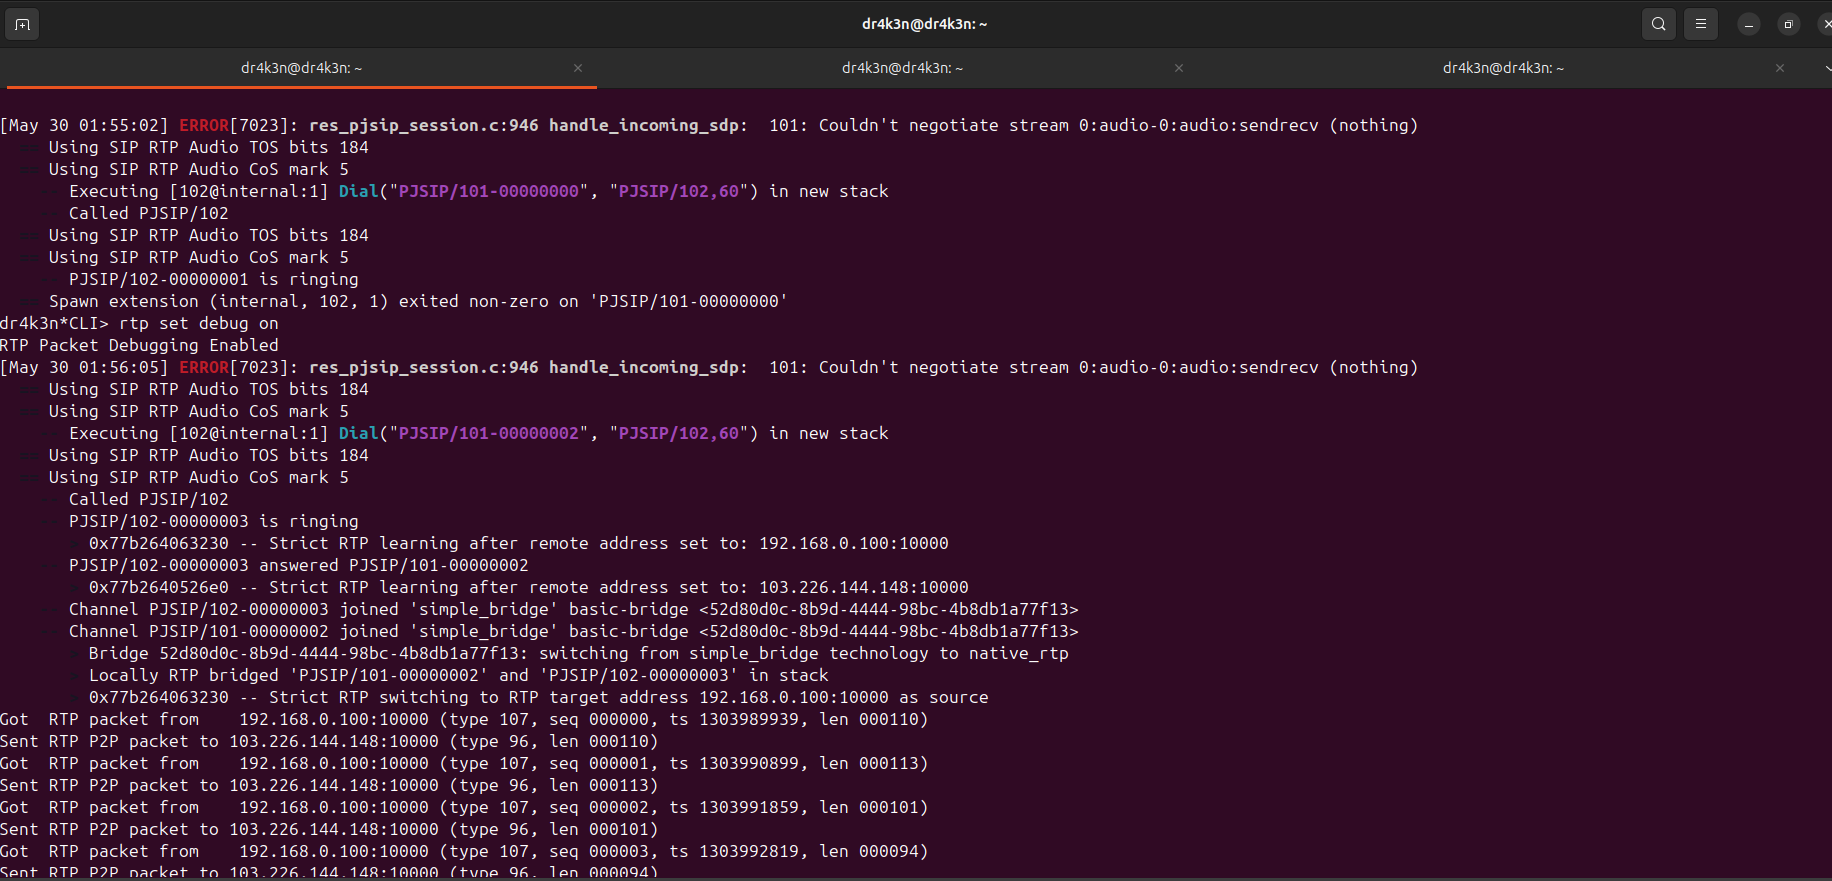
Success! You’re now sending voice over the network using Opus codec. For video calls, Linphone uses H.264.
You can also send messages by dialing different users like 105 or 106 (as defined in extensions.conf).
Deep Dive with Wireshark
Use Wireshark to inspect:
SIP signaling
RTP media packets
Opus/H.264 streams
DTMF signals
This is where it gets exciting for CTF enthusiasts. Capture the VoIP traffic and create puzzles around:
Voice recovery
DTMF-based flag inputs
Hidden messages in SIP headers
Want an example?
Check out my VoIP-based CTF challenge write-up here where you can get to see the SIP, RTP, H.264, Opus, DTMF packets.
Conclusion
Setting up VoIP might sound intimidating at first, but with Asterisk and Linphone, it’s totally doable—even on a basic setup. Whether you’re learning about network protocols, building CTF challenges, or just want to experiment with audio/video over IP—VoIP is a great playground.